2022.08.17 - [일등박사의 생각/블록체인] - [web3]PYTHON web3를 활용하여 Smart Contract 배포하기!!(1)
2022.08.20 - [일등박사의 생각/블록체인] - [web3]PYTHON web3를 활용하여 Smart Contract 배포하기!!(2)
이번 포스팅에서는 Ethereum Machine에 데이터를 저장하는 함수를 생성해보겠습니다!
Smart Cotract에 배포2- 데이터 저장 함수!!
이번 주제로 사용될 Solidity 코드는 아래와 같습니다!!
함주가 조금 더 복잡하지요~!
pragma solidity 0.8.0;
contract ContactList {

    // PhoneNumber라는 변수는 unint255 타입이다
    uint256 phoneNumber;

    // Contact라는 구조체에는 이름과 전화번화가 포함된다
    struct Contact {
        string name;
        string phoneNumber;
    }

    Contact구조체 배열의  contact를 만듬!!!
    Contact[] public contact; //array for list of contacts

    // mapping 방식을 활용하여 이름으로 전화번호를 얻를 수 있도록 함
    mapping(string => string) public nameToPhoneNumber;


    // returnContact함수 :  저장된 연략처 정보를 Return함
    function returnContact() public view returns (Contact[] memory){
        return contact; //retrieve tuple of all contacts
    }

    // addContact :  Smart Contract 방식으로 이름과 전화번호를 저장함
    function addContact(string memory _name, string memory _phoneNumber) public {
        contact.push(Contact(_name, _phoneNumber)); //append to  Contact[] array

        //위에서 선언한 mapping의 실제 내용!!
        nameToPhoneNumber[_name] = _phoneNumber; //use name to get phone number
    }

}
이제 시작해보아요!!
1. Python Web3로 import 및 세팅
## 기본 페키지 및 주소 불러오기
from web3 import Web3
from solcx import compile_standard, install_solc
import json

BLOCKCHAIN_ADR = "HTTP://127.0.0.1:8545"
chain_id = 1337

# solc 버젼이 맞게 설치
install_solc('0.8.13')
2. plus.sol을 solc로 complie 하기
contact_list_file3  = '''
// save_phonenumber.sol
pragma solidity 0.8.13;
contract ContactList {

    // PhoneNumber라는 변수는 unint255 타입이다
    uint256 phoneNumber;

    // Contact라는 구조체에는 이름과 전화번화가 포함된다
    struct Contact {
        string name;
        string phoneNumber;
    }

    //Contact구조체 배열의  contact를 만듬!!!
    Contact[] public contact; //array for list of contacts

    // mapping 방식을 활용하여 이름으로 전화번호를 얻를 수 있도록 함
    mapping(string => string) public nameToPhoneNumber;


    // returnContact함수 :  저장된 연략처 정보를 Return함
    function returnContact() public view returns (Contact[] memory){
        return contact; //retrieve tuple of all contacts
    }

    // addContact :  Smart Contract 방식으로 이름과 전화번호를 저장함
    function addContact(string memory _name, string memory _phoneNumber) public {
        contact.push(Contact(_name, _phoneNumber)); //append to  Contact[] array

        //위에서 선언한 mapping의 실제 내용!!
        nameToPhoneNumber[_name] = _phoneNumber; //use name to get phone number
    }

}
'''
compiled_sol = compile_standard(
    {
        "language": "Solidity",
        "sources": {"save_phonenumber.sol": {"content": contact_list_file3}},
        "settings": {
            "outputSelection": {
                "*": {
                    "*": ["abi", "metadata", "evm.bytecode", "evm.bytecode.sourceMap"] # output needed to interact with and deploy contract
                }
            }
        },
    },
    solc_version="0.8.13",
)
# print(compiled_sol)
# with open("compiled_code.json", "w") as file:
#     json.dump(compiled_sol, file)

# get bytecode
bytecode = compiled_sol["contracts"]["save_phonenumber.sol"]["ContactList"]["evm"]["bytecode"]["object"]
# get abia
abi = json.loads(compiled_sol["contracts"]["save_phonenumber.sol"]["ContactList"]["metadata"])["output"]["abi"]
3. Ethereum Network에 Deploy 하기!!
# For connecting to ganache
w3 = Web3(Web3.HTTPProvider(BLOCKCHAIN_ADR))

ContactList = w3.eth.contract(abi=abi, bytecode=bytecode)# Get the number of latest transaction
nonce = w3.eth.getTransactionCount(w3.eth.accounts[0])

# build transaction
transaction = ContactList.constructor().buildTransaction(
    {
        "chainId": chain_id,
        "gasPrice": w3.eth.gas_price,
        "from": w3.eth.accounts[-1],
        "nonce": nonce,
    }
)
# Sign the transaction
## 아래의 private_key는 ganache에서 직접 복사해 와야합니다!!
sign_transaction = w3.eth.account.sign_transaction(transaction, private_key="86d33c7ee6acc4400f5e207083cbdb250660630c6e92d14a58f196c740e8bbb7")
print("Deploying Contract!")
# Send the transaction
transaction_hash = w3.eth.send_raw_transaction(sign_transaction.rawTransaction)
# Wait for the transaction to be mined, and get the transaction receipt
print("Waiting for transaction to finish...")
transaction_receipt = w3.eth.wait_for_transaction_receipt(transaction_hash)
print(f"Done! Contract deployed to {transaction_receipt.contractAddress}")
(위 과정에서는 이더리움 네트워크의 mining이 진행되어야 deploy가 완료됩니다)
mining의 경우 다른 python 환경에서 아래와 같이 진행해주세요!!
import time
from web3 import Web3
BLOCKCHAIN_ADR = "HTTP://127.0.0.1:8545"
w3 = Web3(Web3.HTTPProvider(BLOCKCHAIN_ADR))

w3.geth.miner.start()
time.sleep(5)
w3.geth.miner.stop()
진행 후 ganache를 확인해보면!
아래 그림과 같이 1개의 transaction이 생성되었음을 확인할 수 있고
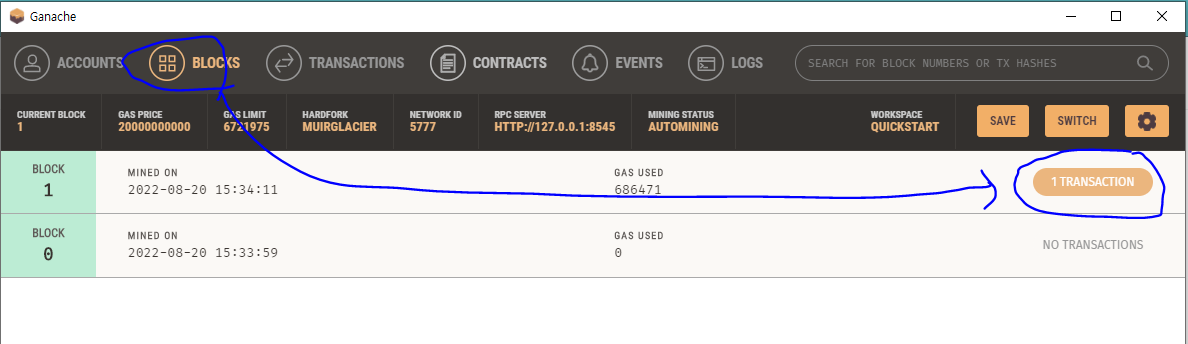
그 Transaction 은 Contract Creation 이었음을 알 수 있습니다

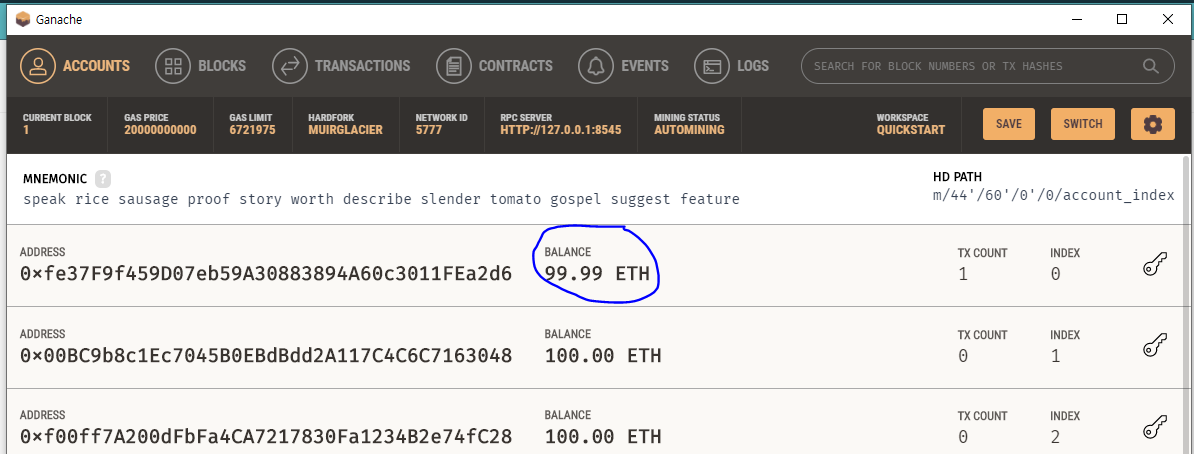
또한 배포에 사용하였던 0번쨰 계정에서는 Gas비용으로 ETH가 소비되었습니다!
4. Ethereum Network에 Deploy 된 함수 불러오기!!
기존 smartcontract Address에서 smartcontract를 불러온 뒤 returnContact함수를 호출합니다!!
contact_list  = w3.eth.contract(address=transaction_receipt.contractAddress, abi=abi)
print(contact_list.functions.returnContact().call())
그 결과!! 아래와 같이 호줄은 잘 되지만 저장된 값이 아무것도 없음을 확인할 수 있지요!!

5. Ethereum Network에 Deploy 된 Smart Contract에 데이터 저장하기!!
기존 smartcontract Address에서 smartcontract를 불러온 뒤
addContact함수를 호출하여 데이터 ("test_name", "+82-10-1234-5678") 를 저장합니다!
nonce = w3.eth.getTransactionCount(w3.eth.accounts[1])
store_contact = contact_list.functions.addContact(
    "test_name", "+82-10-1234-5678"
).buildTransaction({"chainId": chain_id, "from": w3.eth.accounts[1], "gasPrice": w3.eth.gas_price, "nonce": nonce })

# Sign the transaction
sign_store_contact = w3.eth.account.sign_transaction(
    store_contact, private_key="da8cae6e713aa761ce668f70221adf8088623a1f7a54642f36bf0049e8f617bb"
)
# Send the transaction
send_store_contact = w3.eth.send_raw_transaction(sign_store_contact.rawTransaction)
transaction_receipt = w3.eth.wait_for_transaction_receipt(send_store_contact)
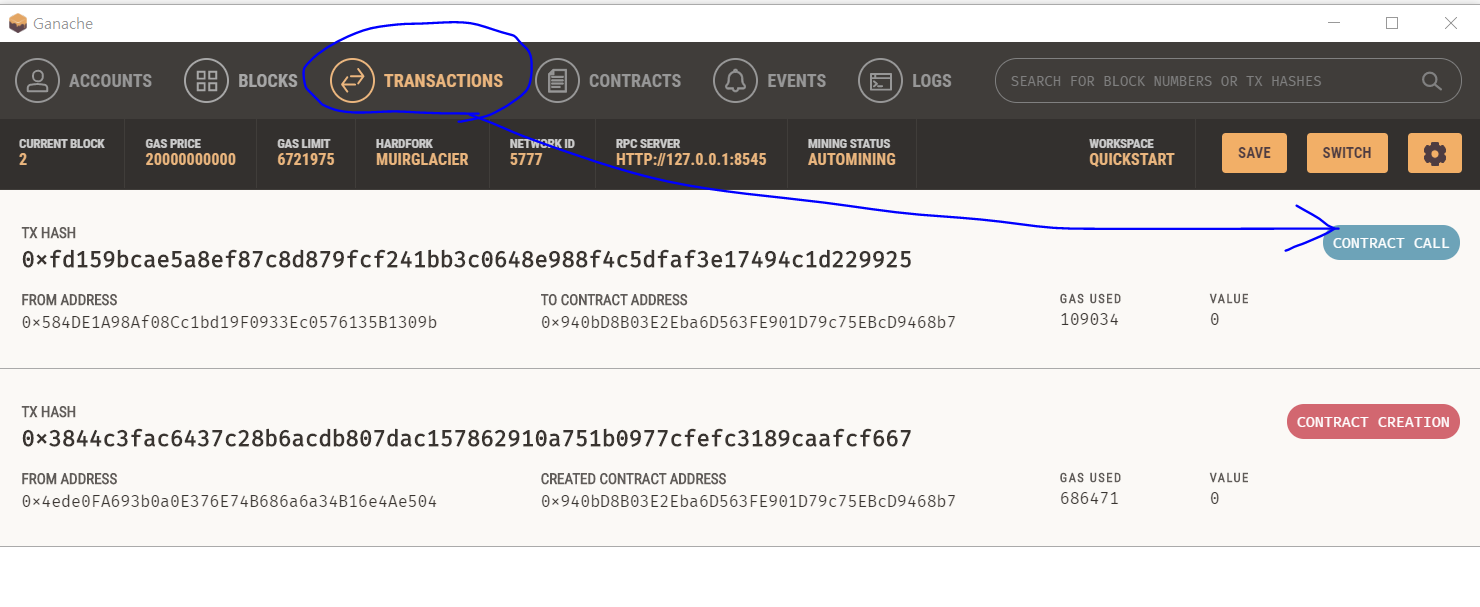
ganache를 확인해 볼까요!?
그리고 저장된 내역을 확인해봅시다!!
print(contact_list.functions.returnContact().call())
추가로 저장해봅시다!!
## 저장 + 1
nonce = w3.eth.getTransactionCount(w3.eth.accounts[1])
store_contact = contact_list.functions.addContact(
    "test_name1", "+82-10-1234-1234"
).buildTransaction({"chainId": chain_id, "from": w3.eth.accounts[1], "gasPrice": w3.eth.gas_price, "nonce": nonce })

# Sign the transaction
sign_store_contact = w3.eth.account.sign_transaction(
    store_contact, private_key="da8cae6e713aa761ce668f70221adf8088623a1f7a54642f36bf0049e8f617bb"
)
# Send the transaction
send_store_contact = w3.eth.send_raw_transaction(sign_store_contact.rawTransaction)
transaction_receipt = w3.eth.wait_for_transaction_receipt(send_store_contact)

## 저장 + 2
nonce = w3.eth.getTransactionCount(w3.eth.accounts[1])
store_contact = contact_list.functions.addContact(
    "test_name3", "+82-10-1234-2234"
).buildTransaction({"chainId": chain_id, "from": w3.eth.accounts[1], "gasPrice": w3.eth.gas_price, "nonce": nonce })

# Sign the transaction
sign_store_contact = w3.eth.account.sign_transaction(
    store_contact, private_key="da8cae6e713aa761ce668f70221adf8088623a1f7a54642f36bf0049e8f617bb"
)
# Send the transaction
send_store_contact = w3.eth.send_raw_transaction(sign_store_contact.rawTransaction)
transaction_receipt = w3.eth.wait_for_transaction_receipt(send_store_contact)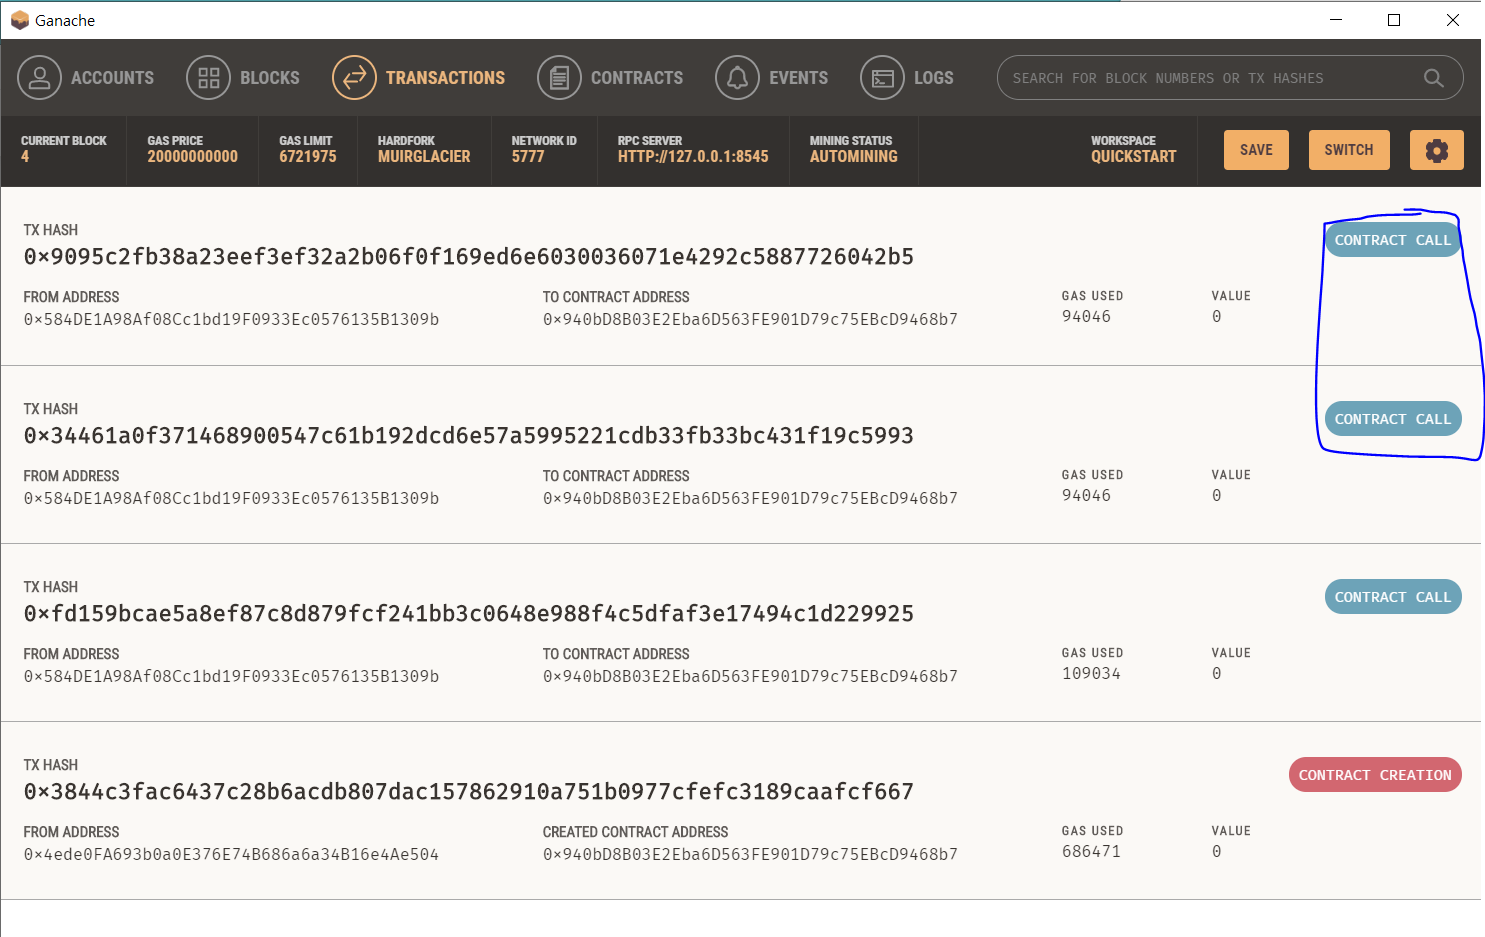
아래와 같이 최종 호출에서 저장된 모든 정보를 불러올 수 있습니다!!

그런데!! 이때는 데이터 저장이 되지요!?
그래서 Contract Call을 했던1번쨰 지갑에서 ETH가 소모됭믈 확인할 수 있습니다!!!

다음번 포스팅에서는
Private Ethereum Network에 Token을 생성해보아요~!
'블록체인 > [파공이]파이썬으로 공부하는 이더리움(Web3)' 카테고리의 다른 글
| [web3] 이더리움의 테스트넷 세폴리아(Sepolia ) 메타마스크에 추가하기!! (0) | 2023.03.27 |
|---|---|
| [web3]PYTHON web3를 활용하여 Smart Contract 배포하기!!(4) - Token 제작 (0) | 2022.09.25 |
| [web3]PYTHON web3를 활용하여 Smart Contract 배포하기!!(2) - 더하기 함수 (1) | 2022.08.20 |
| [web3]PYTHON web3를 활용하여 Smart Contract 배포하기!!(1) - Hello World 프린트 (0) | 2022.08.17 |
| [web3] Python Web3.py 패키지를 활용하여 데이터 주고받기! (0) | 2022.08.17 |


댓글